Step 1 – Add Jenkins PPA
Jenkins is available in two versions. One is LTS release provides long-term support and other provides latest version.Add LTS Version PPA
$ wget -q -O - http://pkg.jenkins-ci.org/debian-stable/jenkins-ci.org.key | sudo apt-key add - $ sudo sh -c 'echo deb http://pkg.jenkins-ci.org/debian-stable binary/ > /etc/apt/sources.list.d/jenkins.list'
Add Latest Version PPA
$ wget -q -O - https://jenkins-ci.org/debian/jenkins-ci.org.key | sudo apt-key add - $ sudo sh -c 'echo deb http://pkg.jenkins-ci.org/debian binary/ > /etc/apt/sources.list.d/jenkins.list'
Step 2 – Install Jenkins
Now update your apt-get cache and install Jenkins using following commands.$ sudo apt-get update $ sudo apt-get install jenkinsAfter installation Jenkins start on port 8080. In my case port 8080 was busy in some other process so edited /etc/default/jenkins and update HTTP_PORT to 8081.
HTTP_PORT=8081and restarted Jenkins service again
$ sudo service jenkins restart
Step 3 – Access Web Interface
Now access your server on port 8080 (in my case 8081) in your favorite web browser. Default installation password can be found at /var/lib/jenkins/secrets/initialAdminPassword as showing in below image.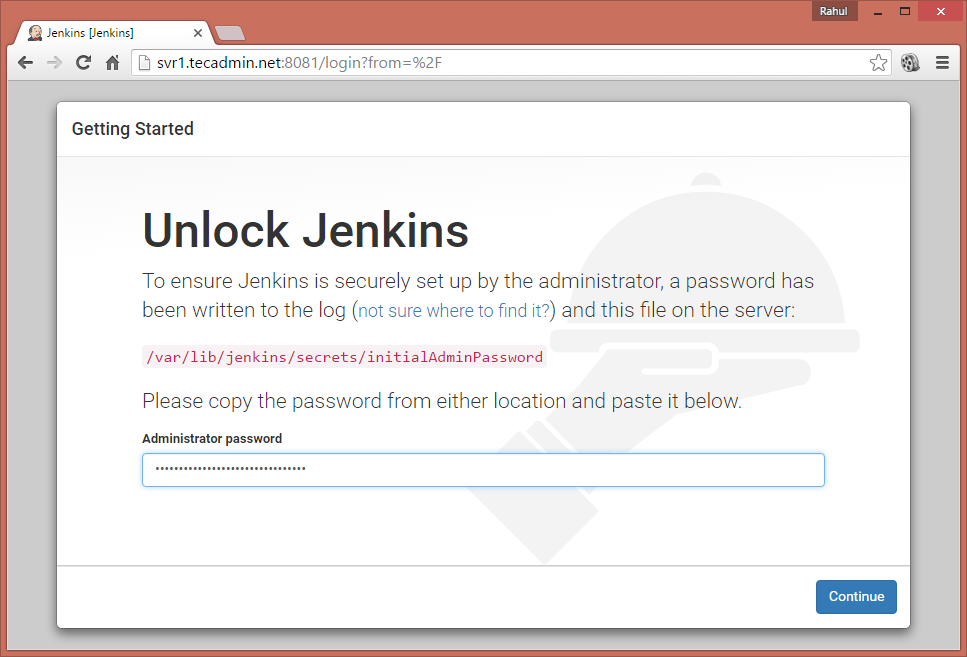
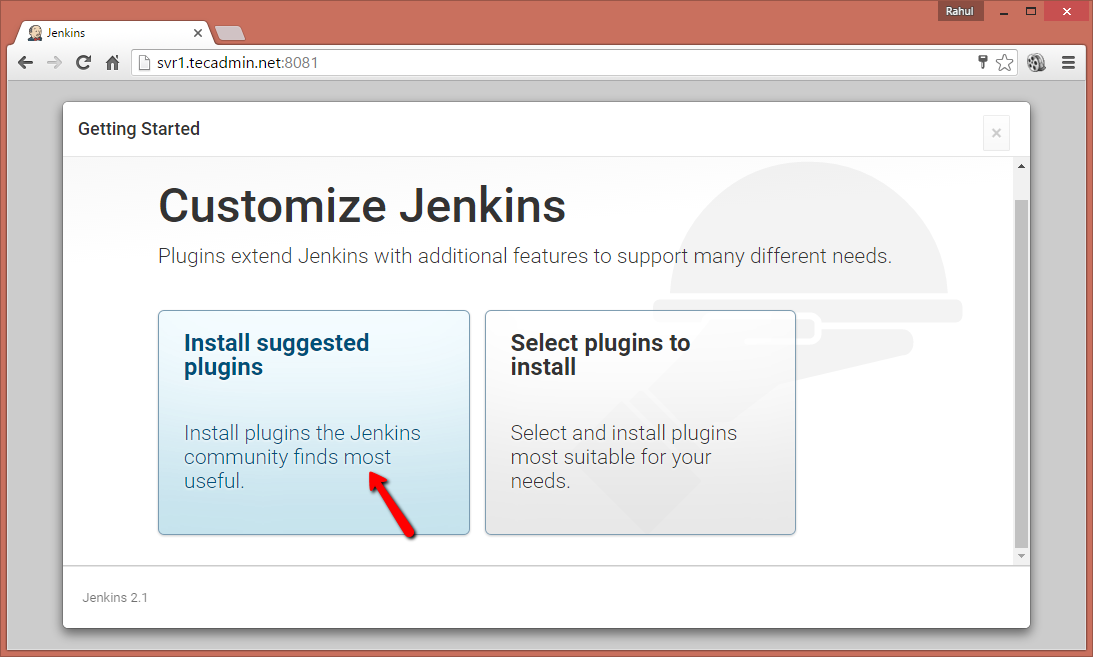
Now select appropriate option to install plugin. You can choose to install suggested plugins or select required plugins options.
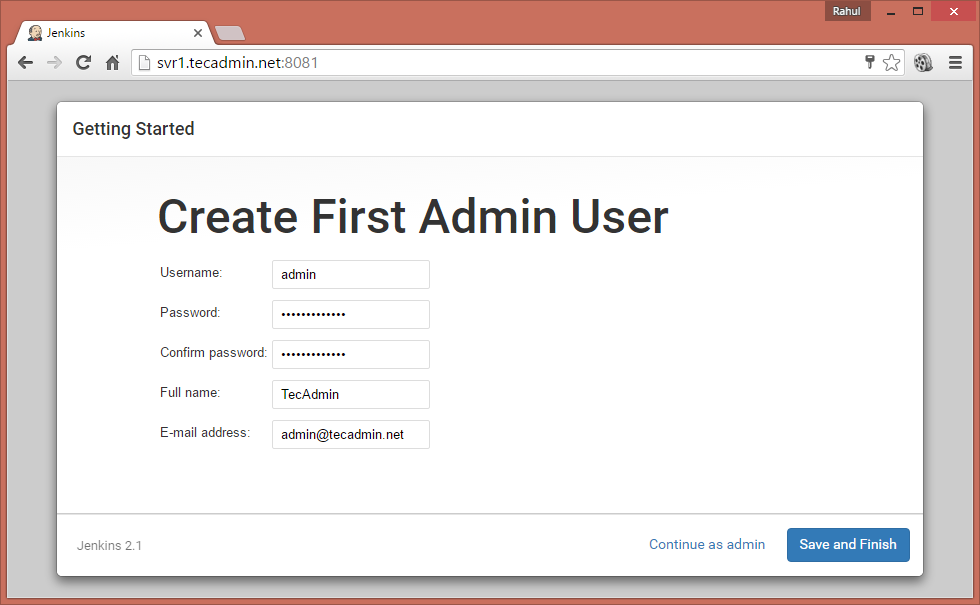
Now create a admin account for your Jenkins setup. This will required to login to Jenkins.
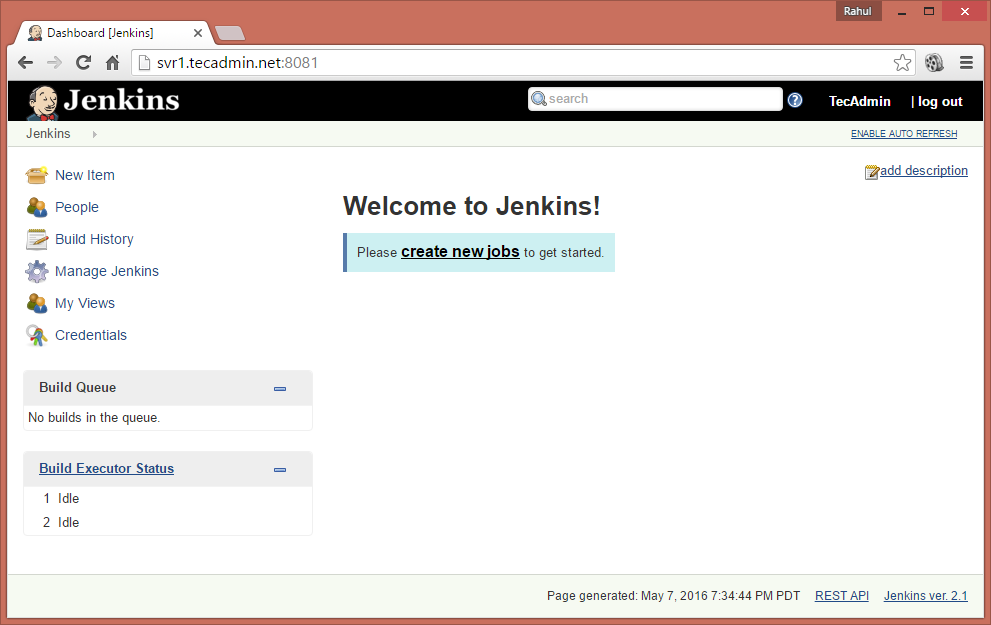
After successful completion of Jenkins setup wizard, You will be redirected to Jenkins dashboard.
Step 4 – Install Plugins in Jenkins
Login to Jenkins dashboard and navigate to Manage Jenkins >> Manage Plugins >> Available Tab and select the plugins to install.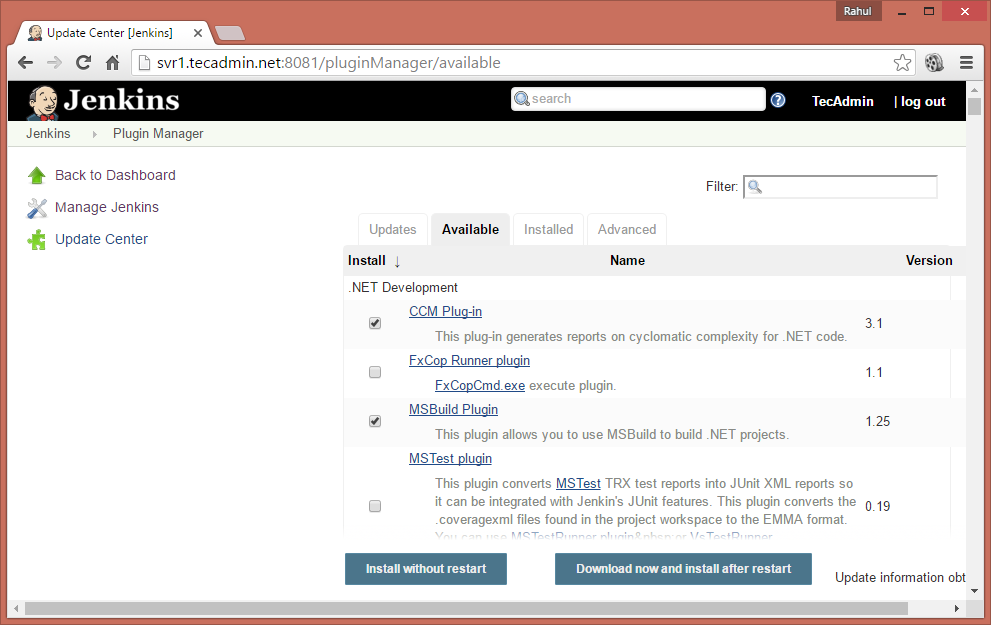
To update existing installed plugins in Jenkins Manage Jenkins >> Manage Plugins >> Update Tab
Step 5 – Create Users in Jenkins
To create users in Jenkins login to Jenkins admin panel and navigate to Manage Jenkins >> Manage Users >> Create User . Enter the required details and click Create User.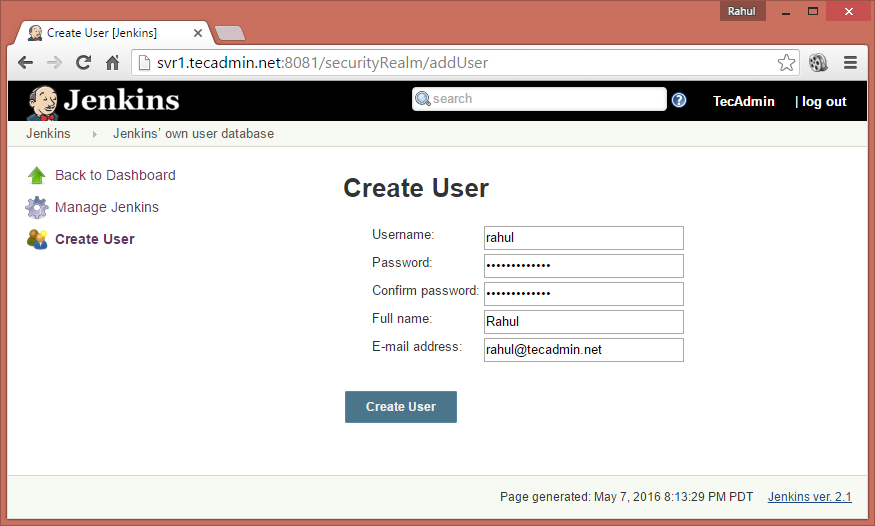
Comments
Post a Comment