
This article will help you to install phpMyAdmin in Ubuntu systems using apt package manager. To install phpMyAdmin on CentOS, Redhat and Fedora refer this article.
Step 1: Install Apache2, PHP and MySQL
We assume you already have installed LAMP on your system. If you do not have installed, Use following command to install it. Below command will install Apache2, PHP5 and MySQL server in your Ubuntu, Debian and LinuxMint systems.$ sudo apt-get install apache2 php5 mysql-server
Step 2: Install phpMyAdmin
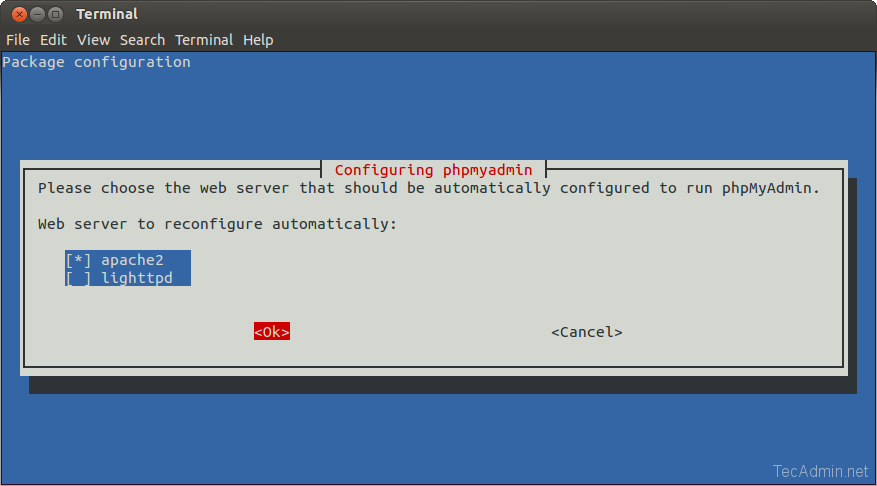
After installing LAMP stack on your system, let’s install phpMyAdmin using below given command in your Ubuntu system.$ sudo apt-get install phpmyadminDuring installation it will prompt for selecting web server, you have installed on your system. Select appropriate web server you used.
Step 3: Configure Apache2 for phpMyAdmin
After installation of phpMyAdmin it creates a configuration file /etc/phpmyadmin/apache.conf for Apache2. Also latest pacakage make a softlink to this file to /etc/apache2/conf-available/phpmyadmin.conf and enabled it. In case this Apache2 conf file is not created, do it manually with following commands.$ sudo ln -s /etc/phpmyadmin/apache.conf /etc/apache2/conf-available/phpmyadmin.conf $ sudo a2enconf phpmyadminAfter updating above entry, restart Apache2 service using following command
$ sudo service apache2 restart
Step 4: Access phpMyAdmin
You phpMyAdmin installation has been completed successfully. Open you favourite web browser and access following url to open phpMyAdmin, change the localhost with servers hostname or ip address.http://localhost/phpmyadmin/

Using single phpMyAdmin we can manage multiple MySQL servers by adding multiple remote MySQL server. Use this article to add multiple MySQL hosts in phpMyAdmin.
Comments
Post a Comment