Tomcat is developed by Apache Foundations. It is known as Apache Tomcat. It is an open source web server for Java based web application. Tomcat is licensed under Apache License version 2. Apache tomcat team has announced its latest alpha release 9.0.0.M1 (alpha) on Nov 19, 2015.
Warning:- Apache Tomcat 9 is in Alpha release, Use this release for learning and development only. For production servers use
Apache tomcat 8.
Install Apache Tomcat 9
This article will help you to Install Tomcat 9 (alpha) on CentOS & Red Hat systems. Tomcat 9 alpha release is available for download. To install other version of tomcat visit
Tomcat 8 on CentOS & Red Hat.
Step 1: Verify JAVA
JAVA is the first requirement of Tomcat installation. Use the following command to check if you have Java installed already on your system.
# java -version java version "1.8.0_66" Java(TM) SE Runtime Environment (build 1.8.0_66-b17) Java HotSpot(TM) 64-Bit Server VM (build 25.66-b17, mixed mode)
Tomcat 9 is designed to run on Java SE 8 and later. So make sure you have installed correct version on your system. If you don’t have Java installed on your system or installed lower version, use one of the following link to install Java first.
Step 2: Download Tomcat Archive
Download Apache Tomcat 9 archive file using following commands or you can visit Tomcat 9
official download page for download most recent available version. After downloading extract archive file in /opt directory. You may change this location as per your setup.
# cd /usr/local # wget http://www.us.apache.org/dist/tomcat/tomcat-9/v9.0.0.M1/bin/apache-tomcat-9.0.0.M1.tar.gz # tar xzf apache-tomcat-9.0.0.M1.tar.gz # mv apache-tomcat-9.0.0.M1 tomcat9
Step 3: Configure Environment Variables
Before starting Tomcat, configure CATALINA_HOME environment variable in your system using following commands.
# echo "export CATALINA_HOME="/usr/local/tomcat9"" >> ~/.bashrc # source ~/.bashrc
Step 4: Setup User Accounts
Finally we need to create user accounts to secure and access admin/manager pages. Edit
conf/tomcat-users.xml file in your editor and paste inside
<tomcat-users> </tomcat-users> tags.
<!-- user manager can access only manager section --> <role rolename="manager-gui" /> <user username="manager" password="_SECRET_PASSWORD_" roles="manager-gui" /> <!-- user admin can access manager and admin section both --> <role rolename="admin-gui" /> <user username="admin" password="_SECRET_PASSWORD_" roles="manager-gui,admin-gui" />
Step 5: Starting Tomcat
Tomcat is very easy to use, There are no need to compile its source. You simple extract the archive and start the tomcat server. Tomcat by default start on port 8080, So make sure no other application using the same port.
# cd /usr/local/tomcat9 # ./bin/startup.sh
[Sample Output] Using CATALINA_BASE: /usr/local/tomcat9 Using CATALINA_HOME: /usr/local/tomcat9 Using CATALINA_TMPDIR: /usr/local/tomcat9/temp Using JRE_HOME: /opt/jdk1.8.0_66 Using CLASSPATH: /usr/local/tomcat9/bin/bootstrap.jar:/usr/local/tomcat9/bin/tomcat-juli.jar Tomcat started.
Step 6: Access Tomcat in Browser
Tomcat server default works on port
8080. Access tomcat on a web browser by connecting your server on port 8080.
Access Tomcat Home:- This is default tomcat home page. There are no authentication required to access this page..
http://localhost:8080
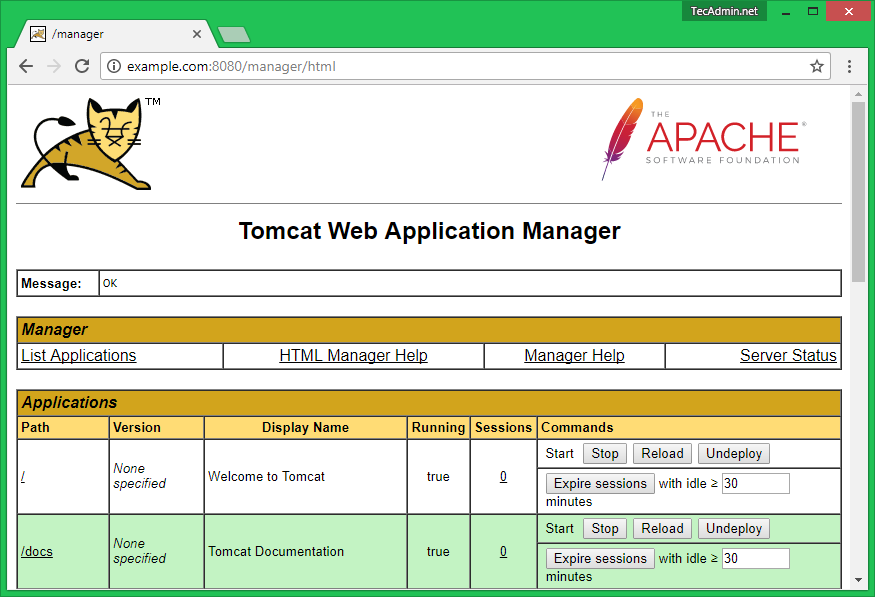
 Access Manager App Page:-
 Click on
Manager App button on home page.This page is allowed for Admin and Manager access both.
http://localhost:8080/manager/html
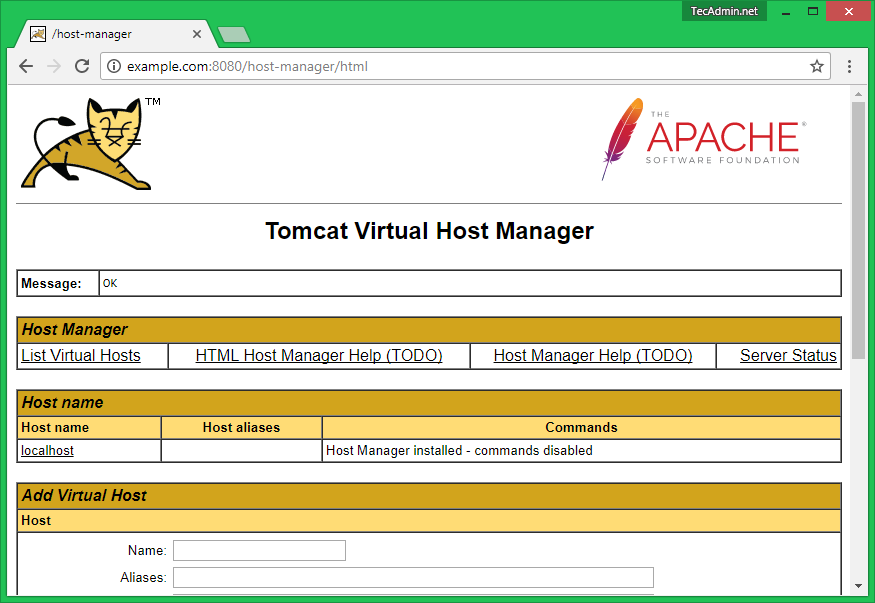
 Access Host Manager Page:-
 Click on
Host Manager button on home page.This page is allowed for Admin access only.
http://localhost:8080/host-manager/html
Thanks for Visit Here


Comments
Post a Comment