WordPress is the most popular content management system used world-wide. This tutorial will help you to set up password protected WordPress admin wp-admin directory and make it secure from public use. So that
Step 1 – Generate .htpasswd File
If you have shell access, You can generate .htpasswd file using command line. First create the directory structure where you want to place this file. It will good to put this file outside of document root.
$ touch /etc/apache2/.htpasswds/.htpasswd
Now use following command to create first user in .htpasswd. cPanel users can can use their dashboard to generate this file. If you don’t have shell access, you can use
online htpasswd generator it and put on your server.
$ htpasswd -m /etc/apache2/.htpasswds/.htpasswd user1
Step 2 – Configure .htaccess
Now create a .htaccess under wp-admin directory on server and put following content. Update the location of
AuthUserFile properly as per location of .htpasswd on your server.
# Password Protected wp-admin directory AuthType basic AuthName "Only Admin Allowed" AuthUserFile /etc/apache2/.htpasswds/.htpasswd AuthGroupFile /dev/null require valid-user <Files admin-ajax.php> Order allow,deny Allow from all Satisfy any </Files>
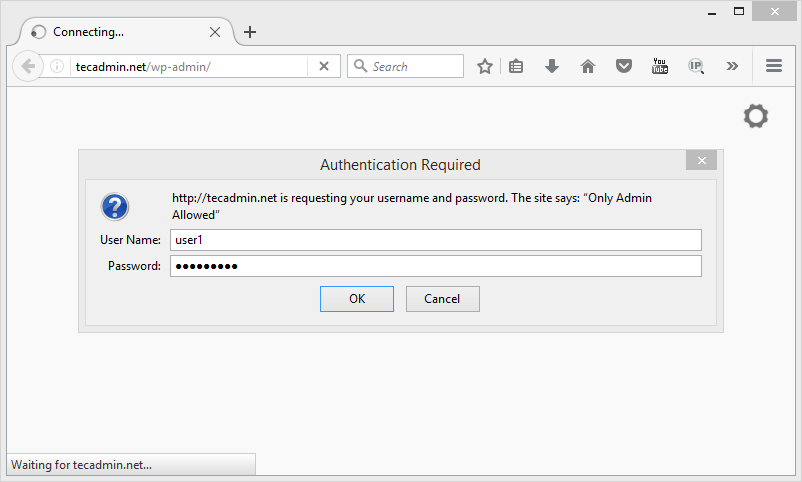
Step 3 – Access Your Website
Now visit your WordPress website home page, It will not prompt for any password. But when you navigate to wp-admin directory, It will prompt for authentication.
Thanks for Visit Here

Comments
Post a Comment